- Preparation is everything: Properly clean, remove hardware, assess damage, and protect your workspace to ensure a smooth, professional finish.
- Know when to strip vs. sand: Thick old finishes often require chemical stripping, while lightly worn surfaces may only need sanding for stain or paint to adhere properly.
- Sand in stages for best results: Use coarse, medium, and fine grits sequentially, always following the wood grain, to achieve a flawless surface ready for finishing.
- Repair before refinishing: Fill scratches, dents, and cracks with wood filler or glue to ensure a smooth, even final finish.
- Choose the right finish for your style: Stains highlight natural wood, paints offer full coverage, and sealants like polyurethane, wax, or oils protect your work.
- Wood type matters: Softwoods, hardwoods, and exotic woods absorb stain differently, so use pre-stain conditioners or specialized finishes when needed.
- Update and maintain for longevity: Modernize older furniture with two-tone finishes, distressing, or new hardware, and maintain refinished pieces with regular cleaning and protective care.
Refinishing wood furniture is one of the most satisfying DIY projects you can take on. It allows you to restore old pieces, update the look of your home, and even create heirloom-quality furniture that will last for years. Whether your furniture is scratched, stained, or outdated, this guide will walk you through every step of the refinishing process. By the end, you’ll have the confidence to tackle any wood piece and transform it into a stylish, polished statement in your home.
Why Should You Refinish Wood Furniture?
Refinishing furniture isn’t just about aesthetics. There are several practical reasons to give your pieces a makeover:
- Restore worn or damaged surfaces: Over time, scratches, dents, and stains can make wood furniture look tired.
- Preserve valuable or antique furniture: Refinishing can protect and extend the life of sentimental or valuable pieces.
- Save money: Instead of buying new furniture, you can refresh what you already own.
- Customize your style: Change the color, finish, or texture to match your home decor.
Refinishing wood furniture can also be a fun creative project for DIY enthusiasts, providing a sense of accomplishment when you see the final results.
What Tools and Materials Do You Need to Refinish Wood Furniture?
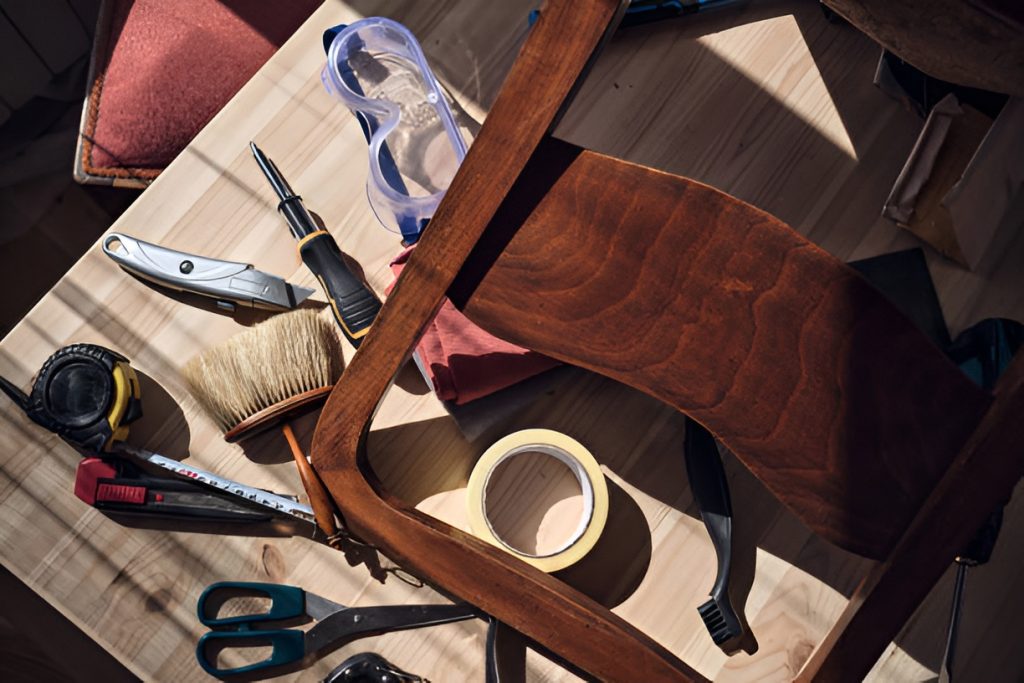
Before you start, gather all necessary tools and materials. Having everything ready ensures the process goes smoothly.
Basic tools you’ll need:
- Sandpaper (various grits from 80 to 220)
- Orbital or palm sander (optional but speeds up sanding)
- Paintbrushes or foam brushes
- Clean rags or tack cloth
- Screwdrivers (to remove hardware)
- Putty knife (for filling scratches or dents)
Materials for refinishing:
- Wood stripper or chemical remover (for old finishes)
- Wood filler (for cracks and dents)
- Stain or paint (depending on your desired finish)
- Wood sealant, polyurethane, or wax
- Mineral spirits or water (for cleaning and thinning finishes)
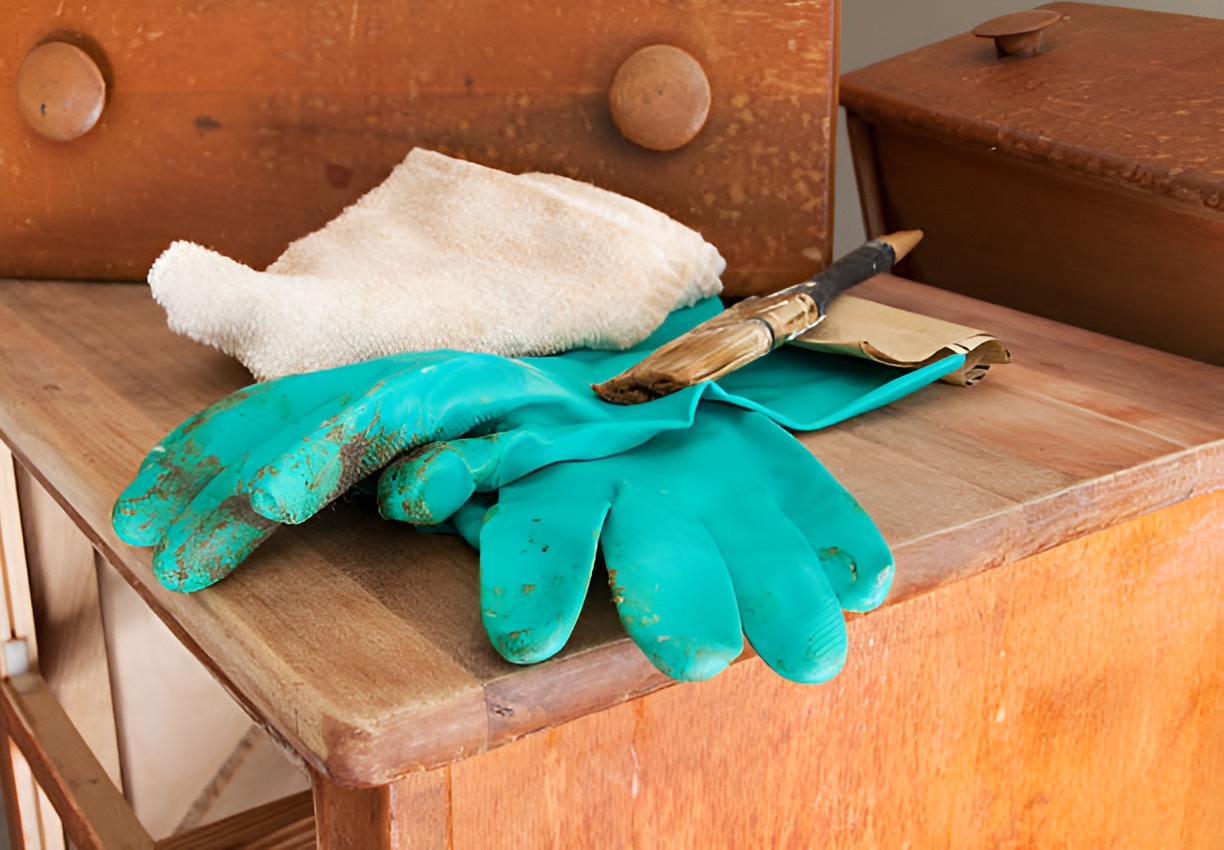
- Gloves and safety goggles
By having the right tools, you can make the refinishing process faster, safer, and more effective.
How Do You Prepare Furniture for Refinishing?
Preparation is the single most important step in any refinishing project. Skipping or rushing this stage can result in uneven finishes, peeling paint, blotchy stain, or other frustrations down the line. Taking the time to properly prep your furniture ensures a smooth, professional-looking result.
Step 1: Remove all hardware
Start by taking off knobs, handles, hinges, or any other removable parts. Use the appropriate screwdriver and keep all screws and hardware in a small container or zip-top bag so nothing gets lost. If the hardware is old or tarnished, you can also choose to clean, polish, or replace it entirely for a fresh look.
Step 2: Clean thoroughly
Even the cleanest-looking furniture can have built-up dust, oils, or grease that interfere with sanding and staining. Use a soft cloth and a mild soap solution, or a dedicated wood cleaner, to wipe down the surfaces. Pay attention to corners and grooves where dirt tends to accumulate. For stubborn grime, you can use mineral spirits to remove it without damaging the wood.
Step 3: Assess the damage
Take a close look at your furniture for scratches, dents, water stains, or cracks. Identifying these imperfections early helps you plan the repairs you’ll need to do before sanding or applying finish. Minor scratches might just need light sanding, but deeper damage may require filler or special treatment.
Step 4: Protect your workspace
Set up a well-ventilated work area with plenty of light. Lay down a drop cloth, old sheets, or cardboard to protect floors and surrounding surfaces from dust, paint, or stain spills. Wearing gloves, a dust mask, and safety goggles is also highly recommended, especially when using chemical strippers or sanding.
Proper preparation might feel tedious, but it’s what separates a DIY “messy” project from a beautifully refinished piece.
Should You Strip the Old Finish or Sand Directly?
One of the most common questions DIYers face is whether to strip the old finish entirely or just sand it down. The right approach depends on the type of finish, its condition, and your desired result.
Strip old paint or varnish
If your furniture has thick layers of paint, varnish, or polyurethane, a chemical stripper can remove it efficiently. Apply the stripper with a brush according to the manufacturer’s instructions, let it sit, then scrape off the old finish with a putty knife. Always work in a well-ventilated area, wear gloves, and protect your skin and eyes.
Sand directly
For pieces with light wear or thin finishes, sanding alone may be sufficient. Sanding removes minor imperfections, rough spots, and the top layer of finish, allowing your new stain or paint to adhere properly.
Pro tip: Test a small, hidden area before committing to stripping or sanding the entire piece. This will show how the wood reacts and help prevent surprises.
How to Sand Wood Furniture Properly
Sanding is essential to achieving a smooth, even finish. It removes old finishes, opens up the wood grain for better stain absorption, and creates a surface that paint can adhere to.
Step-by-step sanding guide:
- Start with coarse grit sandpaper (80–100): This removes old finishes, deep scratches, and uneven spots. Be careful around edges to avoid sanding too aggressively.
- Move to medium grit (150): Smooths the surface and removes any remaining rough patches from the coarse sandpaper.
- Finish with fine grit (220): Leaves the wood polished and ready for staining or painting. Fine sanding ensures the grain is smooth without scratches.
Tips for sanding:
- Always sand in the direction of the wood grain to prevent noticeable scratches.
- Use a sanding block for hand sanding, or an orbital sander for larger, flat surfaces to save time.
- For detailed areas or carvings, use small pieces of sandpaper or sanding sponges to reach tight spots.
Proper sanding lays the foundation for a flawless, professional-looking finish.
How Do You Repair Scratches, Dents, and Cracks?
Repairing imperfections is critical before applying stain or paint. Ignoring scratches, dents, or cracks will make them stand out after finishing.
Scratches:
- Light scratches: Rub with fine steel wool or a wax repair stick to blend them into the surrounding wood.
- Deep scratches: Fill with wood filler or putty, let it dry, then sand smooth before refinishing.
Dents:
- Shallow dents in softwood: Place a damp cloth over the dent and gently iron it. The steam can lift the fibers back into place.
- Larger dents: Use wood filler to level the surface, then sand smooth once dry.
Cracks or holes:
- Small cracks can be filled with wood filler and sanded smooth.
- For larger cracks, apply wood glue and clamp the piece until the glue sets. Sand afterward for a seamless finish.
Repairing your furniture carefully ensures the final result is smooth, even, and visually flawless.
How to Choose the Right Stain or Paint

The choice between stain and paint depends on the wood type, your style goals, and the finish you want to achieve.
Stain:
- Highlights the natural wood grain.
- Available in shades from light oak to deep walnut, cherry, or ebony.
- Can be topped with a clear protective coat for durability.
- Ideal if you want a classic, natural wood look.
Paint:
- Offers full coverage and allows for bold or modern color choices.
- Chalk paint and milk paint are popular for shabby-chic or vintage styles.
- Requires a primer for best adhesion and durability.
- Great for completely changing the furniture’s look or matching modern decor.
Pro tip: Always test your chosen stain or paint on a hidden area first. Different woods absorb stain differently, and paint can look slightly different after drying.
How Do You Apply Stain or Paint?
Proper application is key for a long-lasting, professional finish.
Staining:
- Apply stain with a clean brush or cloth, always following the wood grain.
- Wipe off excess stain after a few minutes to achieve a lighter color, or leave it for a darker, richer tone.
- Allow the stain to dry completely before applying a protective topcoat, such as polyurethane or wax.
Painting:
- Apply a primer if needed, especially on raw wood or previously stained pieces.
- Use smooth, even strokes with a brush or foam applicator.
- Let the first coat dry completely, then lightly sand with fine-grit sandpaper for a smooth surface.
- Apply a second coat for full, even coverage.
Tips:
- Work in thin layers to prevent drips or uneven patches.
- Avoid over-brushing, which can leave streaks or brush marks.
- Always let each layer dry completely before moving to the next.
Should You Seal Your Wood Furniture?
Sealing is essential for protecting your refinished furniture from scratches, water damage, and fading. Without it, your hard work may wear off quickly.
Sealing options:
- Polyurethane: Extremely durable and water-resistant; available in matte, satin, or glossy finishes. Ideal for high-traffic furniture.
- Wax: Offers a soft, natural sheen and is easy to apply, but needs periodic reapplication.
- Oil finishes (like tung or linseed oil): Penetrate the wood to enhance grain while providing moderate protection.
Pro tip: Always test your chosen sealant on a small, hidden area. This allows you to see how it affects the color and sheen before committing to the entire piece.
How Long Should You Let Furniture Dry Between Steps?
Patience is key when refinishing wood furniture. Rushing the process can ruin your hard work.
- Allow stripped wood to dry completely before sanding.
- Wait 24 hours after staining before applying sealant.
- Let sealants cure for at least 48–72 hours before heavy use.
Following proper drying times ensures the finish adheres properly and lasts longer.
Can You Refinish Furniture With Different Wood Types?
Yes, you can refinish almost any wood furniture, but it’s important to understand that different wood types behave differently when exposed to stain, paint, or finishes. Knowing your wood type helps you achieve a uniform and professional-looking result while avoiding common pitfalls.
Softwoods (pine, cedar, fir):
- Softwoods are porous and absorb stain unevenly, which can result in blotchy or streaky finishes.
- To prevent this, use a pre-stain wood conditioner. This helps the stain penetrate more evenly and reduces dark spots.
- Light-colored softwoods can also benefit from sanding carefully, as they can dent or scratch easily during prep.
Hardwoods (oak, maple, cherry, birch):
- Hardwoods are dense, making them ideal for staining because they absorb it more consistently.
- These woods often produce richer, deeper colors and a natural grain pattern that looks beautiful with clear finishes or tinted stains.
- Be mindful of grain direction during sanding and staining to enhance the wood’s natural beauty.
Exotic woods (teak, mahogany, rosewood):
- Exotic woods often contain natural oils that can interfere with standard stains or paints.
- Some may require specialized oils, varnishes, or finishing products designed for oily woods.
- Light sanding and testing a small area first is crucial, as some finishes may not adhere well to these types of wood.
Pro tip: Always identify your wood before starting a refinishing project. Even a small misstep with stain or paint can dramatically change the final color or texture. Testing on a hidden area ensures your approach works for that specific wood type.
How to Add Modern Style to Older Furniture
Refinishing isn’t just about restoring old furniture—it’s also a chance to reinvent the piece and make it fit your modern home aesthetic. Small updates can completely change a piece’s style without replacing it.
Two-tone finishes:
- One of the easiest ways to modernize old furniture is by combining paint and stain.
- For example, you could paint the frame a neutral or bold color and stain the top surface a complementary wood tone.
- This creates visual contrast and makes the piece feel contemporary while preserving its wood elements.
Distressing techniques:
- Sanding edges, corners, or raised surfaces lightly gives furniture a worn, shabby-chic look.
- Distressing works well for rustic, farmhouse, or vintage-inspired designs.
- Be careful not to overdo it—subtle distressing often looks more intentional and elegant than heavy sanding.
Metal accents and hardware updates:
- Swapping outdated knobs, pulls, or hinges can dramatically update a piece.
- Popular modern choices include brass, matte black, brushed nickel, or copper finishes.
- Hardware updates can also enhance function, like adding smooth-gliding drawer slides or soft-close hinges.
Additional design touches:
- Consider painting patterns, geometric designs, or stripes on flat surfaces for a modern flair.
- Adding glass panels, mirrors, or even wallpapered drawer liners can make older furniture feel like a new statement piece.
Even small design updates can completely transform the personality of an old piece, giving it a fresh, modern look while keeping the original structure intact.
How Do You Maintain Your Refinished Furniture?
Proper care extends the life of your refinished furniture:
- Clean regularly with a soft cloth and mild cleaner.
- Avoid placing furniture in direct sunlight to prevent fading.
- Use coasters, placemats, and pads to protect the surface from heat and moisture.
- Reapply wax or oil finishes periodically to maintain sheen and protection.
Regular maintenance keeps your furniture looking like new for years.
What Common Mistakes Should You Avoid?
Even experienced DIYers make mistakes when refinishing furniture. Avoid these pitfalls:
- Skipping preparation or cleaning steps.
- Using the wrong sandpaper grit.
- Applying too much stain or paint at once.
- Rushing drying times.
- Neglecting to seal the wood properly.
Being aware of these mistakes can save you time, money, and frustration.
How to Refinish Wood Furniture Without a Workshop
You don’t need a large space to refinish furniture.
- Work on a covered porch, garage, or any well-ventilated area.
- Protect floors and surfaces with drop cloths or cardboard.
- Use portable sanding blocks or small palm sanders.
- Keep tools organized in a toolbox to save time.
With a little planning, even small spaces are perfect for DIY refinishing projects.
How Do You Know When Your Furniture is Done?
The piece is finished when:
- The surface feels smooth with no rough spots.
- Stain or paint has an even color.
- Sealant is fully cured and provides a protective layer.
- Hardware is reinstalled and functions properly.
Step back and admire your work—this is the reward for your effort and patience.
Final Thoughts
Refinishing wood furniture is a rewarding DIY project that can transform old, worn-out pieces into stylish, functional additions to your home. By carefully preparing the furniture, choosing the right tools and finishes, and following proper techniques, anyone can achieve professional-quality results. Whether you’re updating a vintage dresser, salvaging a thrifted table, or personalizing a family heirloom, this guide has everything you need to get started.
Remember, the key to successful refinishing is patience, attention to detail, and a willingness to experiment with styles and finishes. Take your time, follow each step carefully, and soon you’ll have beautiful, refinished furniture that reflects your personal taste and creativity.